Ready to upgrade your AWS AI toolset for more advanced cloud cost management but not sure how to get started?
Our Amazon Bedrock tutorial will provide a comprehensive breakdown for seamless integration.
Read on how to create an account, request access for whatever foundation models you’ll need, and how to build your own custom AI generation tools
Source: Amazon
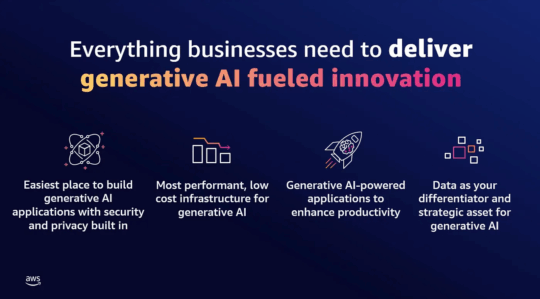
How to get started with AWS Bedrock
Before you get to the fun stuff of Bedrock, you’ll first need to establish an AWS or Bedrock account. Your first steps will differ depending on whether you’re a new AWS user.
Getting started with AWS Bedrock is pretty simple. AWS Bedrock is easy enough to use – you can either work with the already built models in Bedrock, like Anthropic – Claude v1.3 for images or Amazon Titan for copy generation. If you’re looking for greater flexibility, you can customize that model (we’ll get more into that later). You issue commands to your model of choice and – like magic! – you’ll get output.
Getting started if you’re not an AWS user
Source: Amazon
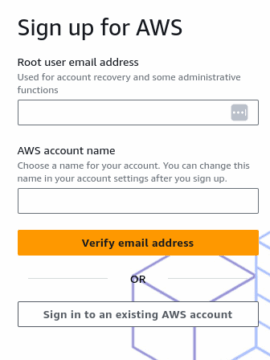
First things first, you’ll need create your AWS account if you don’t already have one.
- Go to https://portal.aws.amazon.com/billing/signup#/.
- Provide the email address of the root user. This is the email address that will be used for admin purposes and account recovery.
- Pick out a name for your AWS account.
- Verify your email address.
- You’ll also need to provide a phone number and verify your identity over a phone call.
- AWS will send a final confirmation email, and you’re done!
If you need to make any changes to your new account, you can access them by logging in and navigating to My Account.
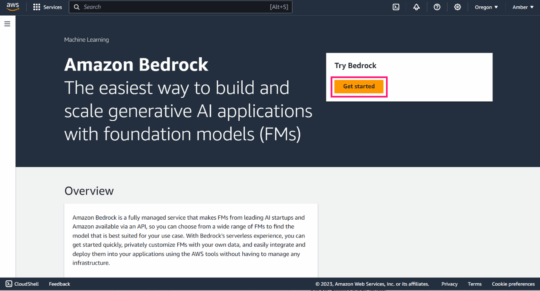
Now that you have an account, you’ll need access to AWS Bedrock.
Getting started if you’re an AWS user
Source: Amazon
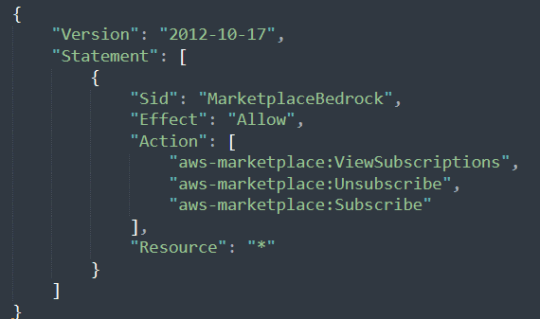
If you already have an AWS account, your next step is creating a role with the permissions needed to access AWS Bedrock. You can do this with AWS’ IAM (inventory and access management).
- Create a new role using the IAM User Guide.
- Attach AmazonBedrockFullAccess AWS-managed property to the role once you’re finished.
- Consider your AWS Bedrock method of choice. Depending on if you decide to go with AWS Bedrock console, CLI, or API, your steps will look a bit different.
- Once you’ve made your choice, you can use this JSON object as the policy:
- If you want to add more users, you’ll need to assign them this AWS Bedrock role, grant that user permissions to switch roles, provide a user ID and role name, and then you’re in business!
Source: YouTube
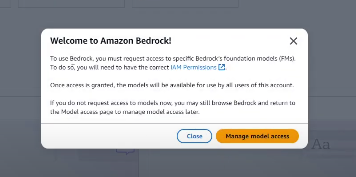
Requesting access to AWS Bedrock Foundation Models
You now should have access to your new Amazon Bedrock account. Before you can get to the fun stuff though, you’ll need to access the foundation models you use to build your new AI tools.
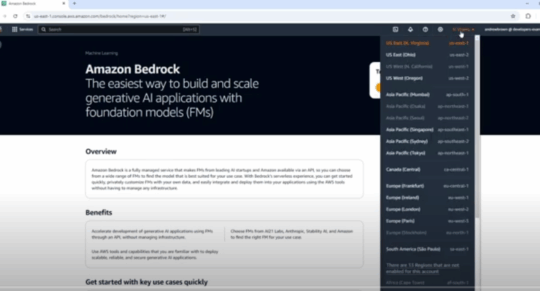
- Open your Amazon Bedrock console.
- For this tutorial, select the U.S. East (North Virginia) (us-east-1) Region. Do this by navigating to the Region text at the top right of the console.
Source: YouTube
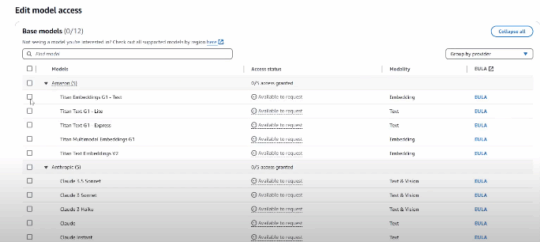
- Go to the bottom left navigation pane and select Model access.
- In Model access, you’ll need to review the End User License Agreement and agree.
- Select Modify model access.
Source: YouTube
- You can then choose to enable all models or enable specific models. If you want to use a specific model, you’ll need to select the name of your chosen provider and model.
- For this tutorial, let’s say you pick a specific model. You can request access to said model and then choose Next.
- Review your model to confirm your correct choice and continue to the Terms.
- Once you’ve read and agreed, hit Submit.
- The access process can take several minutes to finish. You can tell when it’s done because the Access status for your model of choice will change to Access granted.
How to use AWS Bedrock console
Ready to run some basic prompts? Generate model responses? You’ll need to use Playgrounds – visual interfaces that make it easier to experiment on different models before configurating them into your final application – in Amazon Bedrock console.
Here’s your tutorial for starting your first AWS text generations or image responses. Before we dig in, make sure you already have the following:
- You have an AWS account and access to Amazon Bedrock.
- You requested access to Amazon Titan Text G1 – Express and Amazon Titan Image Generator G1 V1 models.
- You’ve set your region to a specific area.
If you meet all those requirements, you’re ready to go!
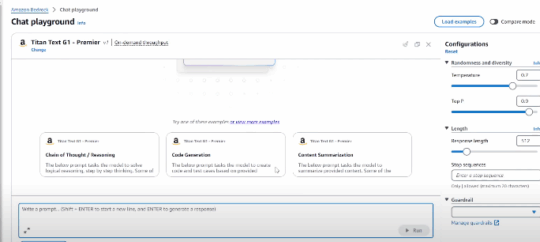
How to use the Chat Playground
Source: YouTube
The Chat Playground acts similarly to ChatGPT, letting you converse with the AI and build on previous conversations. You can train the bot on FinOps-specific data, using it to seamlessly integrate with other tools in your AWS cloud suite and address more complex, multi-part financial queries an average chatbot would struggle to handle.
Using this tool is as easy as hitting Chat Playground and picking your model of choice. Issue your commands and then sit back and watch the AI work.
Depending on the base model you use, you’ll have access to different kinds of controls. You can experiment with different controls like Top P, Top K, or Temperature to control the number of tokens used and response length. A token refers to the unit a model must use to understand a user request and then generate results. Amazon recommends estimating about one token per every six characters.
How to use the Image Playground
The Image Playground can generate anything from data-driven dashboards to illustrations of cost trend simulations. You can download the image after its complete.
Working in the Image Playground is similar enough to the Text Playground. After you’ve signed into your account, do the following:
- Select Playgrounds and then Image from the left navigation pane.
- Select your provider and model under Select Model. If you’re trying out the image generation tool, you’ll probably want to go with something like Amazon Titan Image Generator G1 V1.
- Select either the default prompt or enter a custom prompt like, “Generate a projection of 2025 budget in Q4 based on previous earnings”.
- Select the Number of images you would like to generate. Hit Run.
- Your generated image will appear above your prompt.
Congrats! You’ve now made your first AWS Bedrock image.
How to use the Text Playground

The Text Playground is simpler than the Chat Playground in that it only creates copy. You can’t instruct the AI to act as a person, but it can write your next blog post for you – assuming you have the tokens to spare.
- Sign into your AWS Management console account with your IAM role with Amazon Bedrock permissions.
- Use the left navigation pane to select Playgrounds.
- Go to Text.
- Pick your model of choice. If you’re generating text, you can use the Amazon Titan Text G1 – Lite model. Hit Apply.
- Enter a prompt into your text panel. You can start with something simple like “Define cloud cost management services by supplying the meaning and several benefits.”
- Hit Run. Your generated copy will appear below your prompt in the text panel.
Congrats! You’ve just run your first copy generation program.
How to use Bedrock API
This API feature lets you integrate Bedrock into your applications, making Bedrock a much more flexible tool. What you’re doing with the code we provide below is creating a client object that can interact with Bedrock. You need to provide an input (e.g., cloud cost data or usage patterns) which is passed to the model. You’ll then need to only call your model of choice to get outputs improve the financial operation efficiency.
In this case, we’ll walk you through how to use boto3 to connect to AWS, but there are other ways to call the API. Here’s what you’ll need to do:
- Make sure you Python environment is good to go in the AWS Python SDK.
- Install the latest version of boto3.
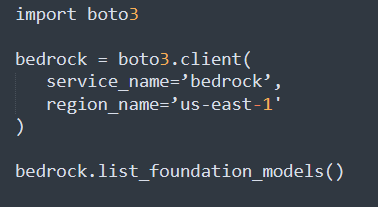
- Import boto3 and then use the below code to call the list_foundation_models() function so you can access AWS’ latest list of models.
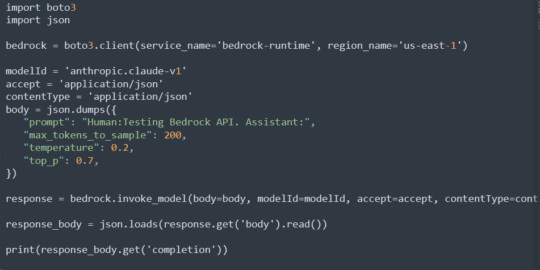
- For this example, let’s take a look at running this code with Claude. Include the information you got from your lost pull and add a prompt.
- Instruct Claude how many tokens it can use and what format it should respond in. If you’re using Claude, you’ll need to provide promopts using the ‘Human: <prompt> ‘Assistant:’ format.
- Run your next round of code with these updates:
You just run your first round of code. See? AWS Bedrock’s API doesn’t need to be intimidating!
If you’re not interested in the API feature, you can also use AWS CLI (Command Line Interface), AWS SDKs, or AWS SageMaker notebooks to accomplish the same things. Since the Bedrock API and SDK are the most common tools, we’ll briefly cover how you can use SDK as well.
How to use Bedrock SDK
Why use AWS SDKs? SDKs can help you automate your processes with things like handle error responses, retry requests, and cryptographic signatures for service requests.
To get started, you’ll want to select the tab with the programming language you’d like to use in the Tools to Build in your AWS account. AWS SDKs are available in almost every popular programming language, so you should be able to find your language of choice easily enough.
No matter the language you go with, your SDK will give you code examples, help documentation on how to build various applications, and an API to make the whole process as easy as possible.
Building a custom model with AWS Bedrock
As you advance your skills with AWS Bedrock, you may start to chafe with the base model’s ability. You don’t need to worry, though. It’s easy enough to customize a model and augment it with your data so it can perform to your expectations.
And you don’t need to worry about providing an AI tool with your personal data. AWS Bedrock was built with privacy and security in mind. It is entirely HIPAA and GDPR-compliant, and no customer data is used to train foundation models. Any data you provide will be encrypted at rest and in transit for maximum security.
With that aside, let’s take a look at how to build out custom Bedrock models:
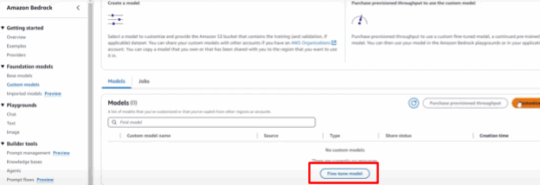
First, you’ll want to navigate to the Custom Model section of the AWS interface. Head to Custom models in the sidebar left-hand navigation, and select Create Fine-tune job, which is nested beneath Custom model.
Source: YouTube
Pro tip: Custom models aren’t cheap. Make sure you have the necessary budget before you get started.
You’ll also need the following information to get your model going:
- What model do you want to use? Consider which base model you want to customize. You’ll also need to develop a new name for this model.
- What do you want to use as training input data? Consider what information you want to use to train your model. Make sure you keep that data in S3 storage.
- Do you want to use hyperparameters? If so, consider how you would like to adjust those metrics.
- Provide necessary output data. You’ll need to enter the S3 location where this data is located.
With all of this provided – and any other details you would like to add to personalize your process – you’re ready to click Fine-tune model and get started on training.
Pro tip: the training might take… a lot of time, depending on the amount of data you’re conveying. This isn’t a complete hands-off process while you wait, though. You’ll want to watch and analyze the results as they come along.
How much will a Bedrock investment cost
Okay, now you’re an expert on AWS Bedrock… but how much will this cost you?
Getting everything set up is simple enough, but Bedrock pricing can be a bit… complicated. Your total price will vary depending on your model of choice and how many tokens you use.
You can save a bit more money by opting into Amazon’s Provisioned Throughput plan, which requires you to commit to a certain amount of usage for either a one or six-month period. You’ll still have to pay extra for every model you customize – and model customization varies by the model.
With all of these factors contributing to AWS costs, you’re right in thinking that budget projections will be just as difficult to track as with most cloud tools.
There is one easy way to track AWS cloud costs down to the hour over two years – cloud cost management tools.
How to manage Bedrock prices
Cloud cost management tools give you 100% visibility into your cloud spend. You can have dashboards displaying your entire multi-cloud spend, regardless of your tools or platforms. And it gets better – using AI, these tools can help you eliminate extraneous spend and even forecast future budgets.
And with Anodot, FinOps teams get AI-powered recommendations to save up to 30% on your annual Bedrock spend.
But why else use Anodot?
Demystifying cloud costs is what we do. And we have the products – and awards – to prove it.
We didn’t waste time resting on our laurels after winning the 2024 EMEA AWS Partner award because we want to make sure our customers have top-of-the-line tools to track cloud costs. We Instead, created the AI tool you need to track those never ending cloud price fluctuations, CostGBT. We’ve partnered with Automat-IT to make it button click-simple to identify hidden costs, create reporting dashboards, and forecast future cloud spend.
Want proof of concept? Talk to us so you can start saving with Anodot’s tools.